

This article is for everyone with an outdated kitchen … which probably means a kitchen that’s more than ten years old … but, you don’t have several thousand dollars to hire a painter to do a makeover the right way.
“Kitchen has OAK CABINETS!!!”. You don’t have to be too old to remember when that what a yuge selling point. That’s no longer the case. We know because we’re selling our house, and it’s generally true that kitchens and baths “sell” homes. We have unpainted ash cabinets – but, with a maple stain and, we’ve heard numerous objections about the kitchen being “outdated”. It appears the rage these days for the ever fickle buying tastes of special snowflakes is painted cabinetry. (Not to mention many people want granite countertops and stainless steel appliances. Well … tough crap on that.) However, I can paint … and save myself thousands of dollars in the process.
Let’s start with the pictures, and then with my conclusions. That way, if you don’t like either, you won’t have to waste your time reading the article.
But, first, a Disclaimer: I am an amateur painter! My dad was a professional painter trained in Germany, and I helped him quite often as a young lad, and learned much from him. But, that just makes me a sonuvapainter. I also did some research on the internet prior to starting this project. I only visited websites authored by professionals with years of experience. Guess what I noticed? All sorts of amateur know-it-alls offering criticisms and objections to the professional! “That’s dumb!” “You don’t have to do this, that, or the other!” “That was a waste of time!”. And so forth. I fully expect the same here because, really, I have no freaking clue if my way is THE right way. I’m sure there are other ways to achieve similar, or even better, results. Your objections will fall on deaf ears … because what I do know is that the road I chose worked for me. I can’t guarantee you’ll achieve the same results, even if you follow each and every step I did. There are just too many variables involved … not the least of which is the person’s skill in, you know, actually painting. OK, the pics …..
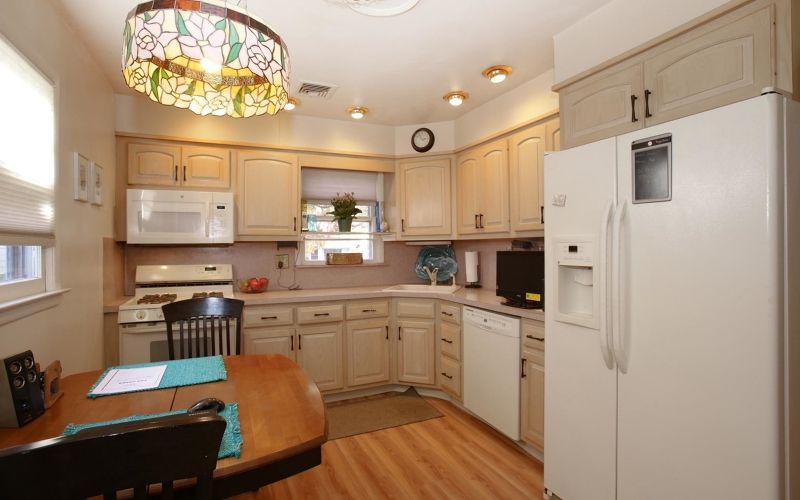
Below is the Before Painting kitchen. Yes, that’s a pinkish counter-top and back-splash.
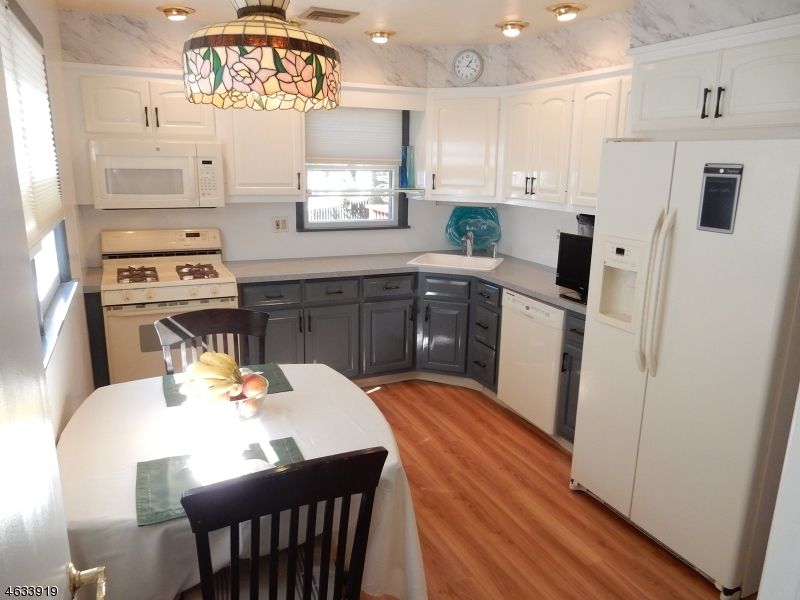
The After Painting
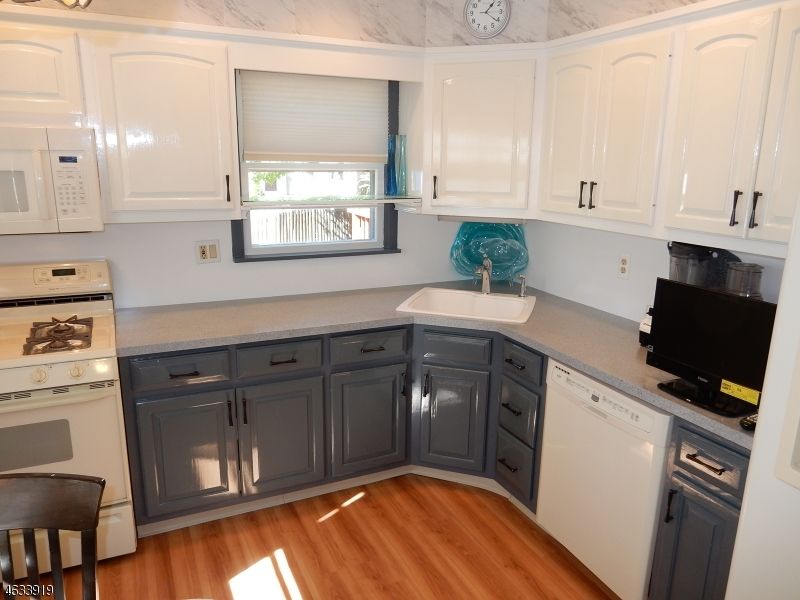
A Closer View
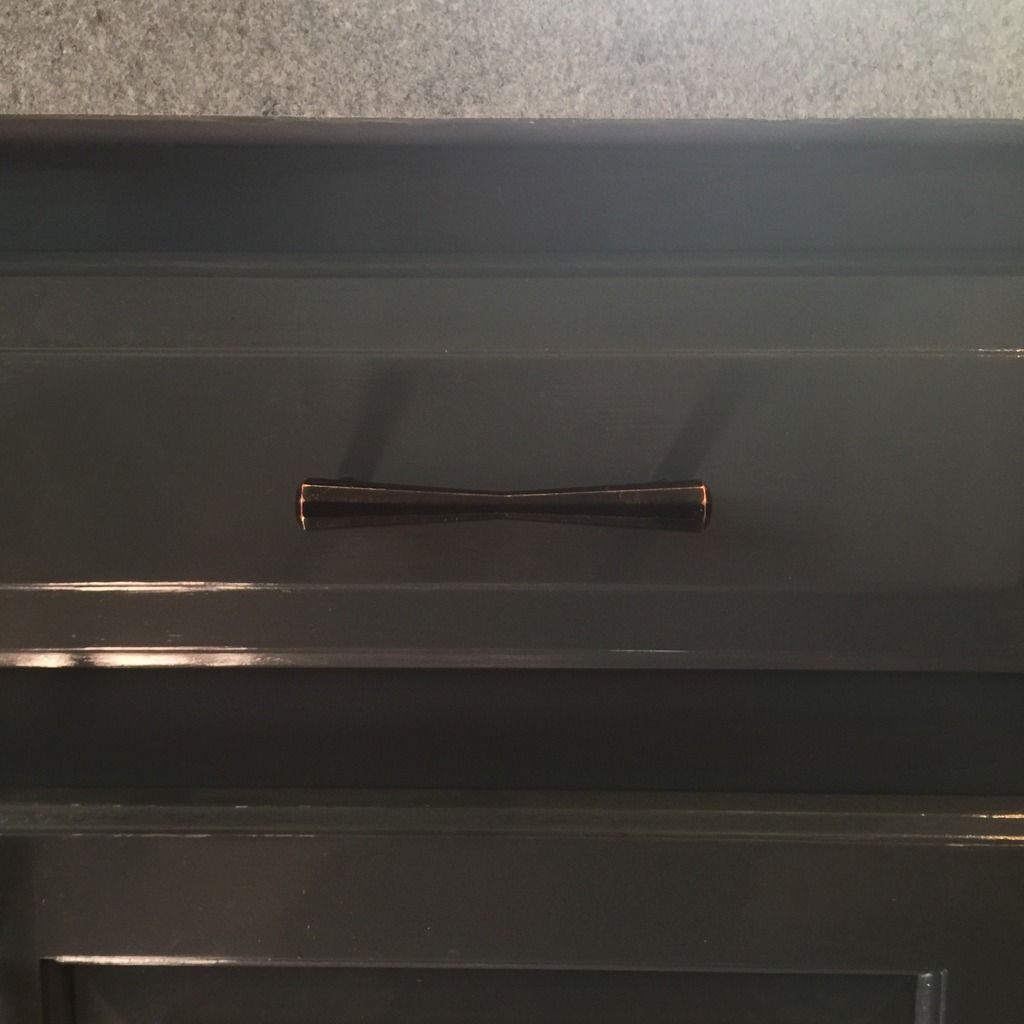
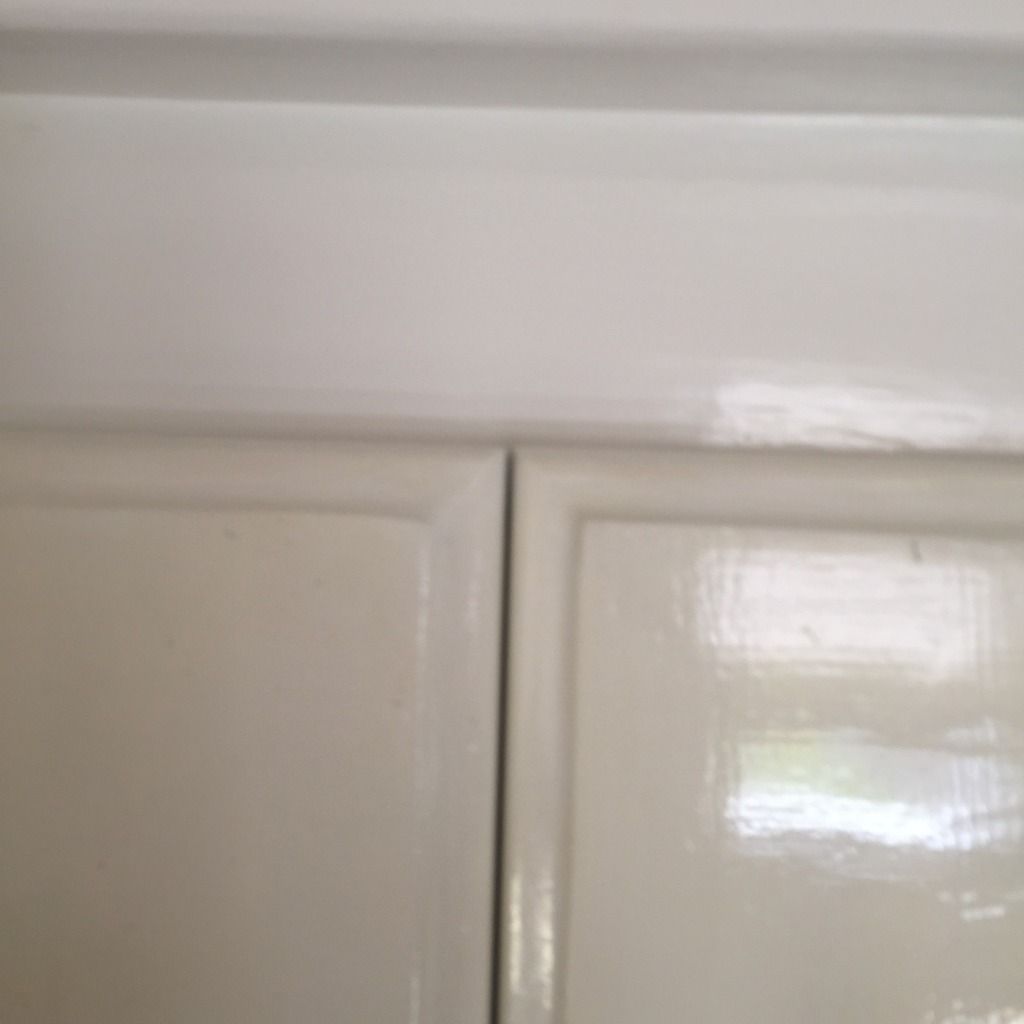
A REALLY close view …. taken from about ten inches and a 150 watt light bulb behind me. Unfortunately, the glare is a bit distorting, especially with the white door. Nevertheless, I don’t think you can see any brush-marks.
CONCLUSIONS:
1)- A great spray job will beat a great brush job each and every time. If you want the very best possible paint job, and if you can afford it, then by all means get a spray job!
2) A great brush job will beat a good-to-poor spray job. People think spraying is so easy. It’s not. In fact, I think it’s easier to screw up a spray job than it is a brush job. Spraying requires much skill … not to mention the equipment and space. If you want to see how crappy a spray job can look … then go find a car painted by Earl Sheib.
3)- You simply cannot achieve flawless results from brushing, although you can come close. While the pictures don’t show brushmarks … they are there! You have to look closely, and with the right lighting and at the right angle, but … they’re there.
4)- Painting by brush is a LOT of work! There are no shortcuts. You might become an alcoholic before the project ends.
5) “A great paint job is 95% preparation and 5% painting.” — Stuckyangelo. If you are looking for “secrets” or shortcuts in this article, you will be sorely disappointed.
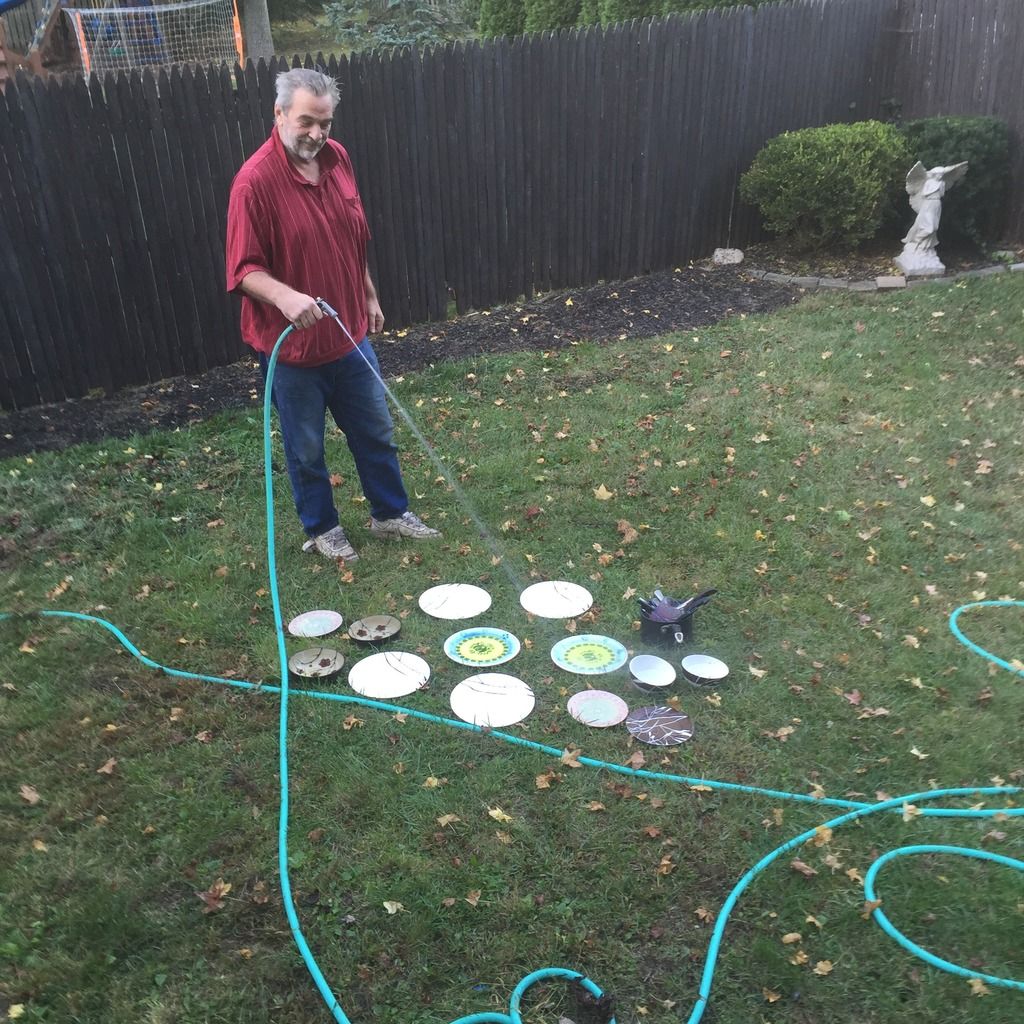
6)- I will never ever undertake a kitchen cabinet painting project again. I would rather swap spit with Hillary! Yeah, it’s that much of a pain in the ass. At one point there was so much paint, clutter, and crap in the kitchen that I had to do the damn dishes in the yard!! Really.
Scenario: This article is about painting raw or stained wood. It is not about repainting painted cabinets. If you do have painted cabinets, and if those cabinets have visible brush strokes, then there is only one thing you can do. You must sand the cabinets until there are no brushstrokes. That might mean sanding down to bare wood. No one said this would be easy. Painting over brush strokes will only result in cabinets with new brush strokes in a different color. Also, this article assumes your wood is in good shape. (Awesome! I just snuck in my one penile innuendo.) I’m not going to get into obvious things such as repairing bad wood before painting, and such. I’m only writing about painting. Just remember this key point: Paint only changes color …. it does NOT cover up flaws.
1)- Remove all the doors and hardware.
Because gravity. The paint will “level” as it dries. Gravity, unfortunately, will pull the paint down. You will achieve the best results by painting the cabinets horizontally. Yes, you can defeat gravity. Another benefit is for the heavy-handed painter; you will be able to apply a thicker coat of paint without the risk of getting runs.
Hint: Number your doors with a small piece of masking tape, then put all the hardware for that door in a baggie, and give it the same number. You only think all the hardware is exactly the same, and in the same spot. It’s not. You’ll thank me later.
2)- Wash everything that will be painted with TSP. You’ll be amazed how dirty the water becomes after years of built up dust, dirt, grease, and even waxes and polishes. I used 00 steel wool and applied rather heavy pressure. Sponge rinse with clean water when done. Dry with towel. Let dry 24 hours. You’ll be doing a lot of sanding so, you might be tempted to skip this step. That would be foolish. Do you want to sand all that bad buildup even deeper into the pores of the wood?
3)- If you have unstained wood (raw), skip this step. You need to get rid of the existing finish. At a minimum, it should at least be dulled/roughed. I sanded down the flat areas to bare wood with an orbital sander, 150 grit sandpaper. (I’m really not concerned about brush strokes in the grooves so, I just give them a few quick passes by hand.) Sanding to bare wood is probably overkill. But, the orbital sander made it relatively fast and easy. I simply wouldn’t tackle such a project without one. A good one is less than $100.
===================
Before I get to Step 4, Priming, let me go off on a money tangent.
Don’t go cheap!! Don’t buy some cheap-ass $20 primer from Home Depot. Buying cheap primer, and cheap paint, and cheap brushes will only undermine your efforts every step of the way … and can only result in a crappy paint job. A Universal Law regarding any DIY project: Cheap tools = cheap results. Here is what I used;
———- BIN Primer. It’s about $50/gallon, and worth every penny.
———- Sherman-Williams Pro Classic Paint. It’s specially formulated for cabinets, costs about $65/gallon, and worth every penny. Warning: It is a thick and heavy paint and definitely takes some practice to get used to it. I started by painting the back of the least frequently used cabinet doors. By the time I had all the backs painted I pretty much had the hang of it.
(Never use all-in-one primer-paint. Primer has a specific function. Paint has a specific function. Combining both in one product results in each function being compromised. You’re literally getting the worst of both worlds.)
———- Purdy XL paint brushes. My main brush was 1.5” and cost almost $30. Purdy makes brushes that cost $100, and higher. I don’t have that kind of money but, I sure as hell would never ever buy a cheap-o throw away brush. If you have to go cheap on other tools, well, OK … but, a cheapo brush will ruin everything, so do all you can to buy the best you can afford. (For latex, buy a synthetic bristle brush with “exploded” tips. For oil based, buy a China Bristle Brush.
===================
4)- Prime. The minimum; Prime, let it dry, and lightly sand it down with 150 grit paper. Sanding down primer is extremely important. Don’t worry how much primer comes off with sanding. I “lost” about 25% of the primer on the first pass. Prime, let it dry, and sand it down with 220 grit paper. Extra Credit: Do it one more time.
(Note: It should go without saying that you must completely remove ALL dust and sanding residue after every sanding episode. Just a few pieces of dust can ruin the look. You’ll get a gritty finish and it’ll look like you painted over sand …. And the only solution is that you will have to sand it and repaint it all over again. Compressed air and tack cloths do the best job of it. You can also wipe the surface clean with a microfiber cloth dampened with mineral spirits.)
That’s right, I primed it three times. By the time the third pass was completed the cabinet doors looked good enough to hang. And that was my goal … to not proceed with painting until the primer job looked perfect. Remember, paint only changes color, it does not hide flaws and imperfections. Primer is usually the biggest culprit of brush marks because it goes on thick and dries fast. This means that the paint doesn’t have time to level out and lay smooth after you brush or roll it on.
Read this carefully; if your final coat of primer has brush strokes then the brush strokes WILL carry forward to your paint job! Make Primer Perfection your goal
5) Paint! You’ve done all the hard work, now comes the reward. Of course, you can absolutely still royally screw it all up with bad technique. I’m not a professional so I’m hesitant to give advice at this point. Just let me give you a couple key points I learned mostly from my dad.
But, first, let me tell you about one the very very best things you can do to eliminate brush strokes. Add Floetrol! Floetrol is a paint conditioner, not a paint thinner. Thinned down paint actually covers less and loses some of the qualities it was built to have. Floetrol, allows paint to keep its coverage while the “thinning” allows the paint so it lay smoother as it slows down the drying time to increase leveling. That’s correct … the faster paint dries, the more likely brush strokes may appear. Put another way …. the longer the paint remains wet, the better it flows and flattens, leaving a smooth surface. Floetrol alone can easily eliminate 50%-75% of your brush marks. (Note: For oil-based paints use Penetrol which is basically the same product, but for oil based paints.) OK, techniques …
— The most common painting mistake is forcing paint out of the brush after it becomes too dry. A dry brush leads to dry painting which WILL introduce brush strokes. Most people can see that with their own eyes, yet continue to dry paint. If forced to give a percentage, I would say I stop painting when there’s still 10% paint in the brush.
— Another huge mistake … applying THICK coats. It is always best to apply paint in thin, light coats. Thin coats will definitely leave fewer visible brushstrokes.
— Stop stroking it so long!! Some people will go back and forth seven, eight, or more times. This is crazy. You should never need more than 3 or 4 strokes. Here’s a fact; too many brush strokes will create air bubbles in the finish, leaving bumps and pits when it dries.
— Stop stroking it so hard!! Why do some people feel it’s necessary to PRESS (!!) their paintbrush INTO the wood?? This accomplishes nothing. Just lay the paint on the wood and let nature and chemistry do all the hard work for you.
— The only correct angle to hold your paint brush while painting is about 45 degrees.
— There’s a fine line between applying paint to fast (which can introduce many mistakes) and too slow (which makes it very difficult to apply a uniform coat). The goal is a uniform thickness but not so thick as to run or sag. With practice, you’ll quickly find the ideal speed to apply uniform thickness. Thickness matters. A lot of bad paint jobs are the result of inconsistency; thick here, thin there, and everything in between. This probably sounds counterintuitive, but it’s probably better to do something incorrectly … as long as your work is consistent. One more time …. Uniformity!
— For best results from brushing, don’t dip directly from the can. As you are painting the paint brush will pick up small particles of dust and debris. You don’t want to transfer that into your main gallon of paint! So, pour paint into a smaller can. Before refilling the smaller can, I always rinse it out first. I’m a anal perfectionist. Perfectionism kills.
— Pigments settle to the bottom! So, don’t forget to stir the main gallon paint can before refilling.

— Professional painters don’t wipe the paint brush against the can. It is really dumb to load up your paintbrush with paint only to wipe half of it off! Here’s the correct way: just tap the paintbrush against the side of the can one or two times.
— I always sand between coats using a very fine Emory cloth or sanding block and sanding very lightly. The sole purpose of sanding between finish coats is to remove any dust contamination or surface irregularities.
— I painted three coats. Kitchen cabinets take lots of punishment from cooking heat and day-to-day use, and wood surfaces need all the protection they can get.
— Always read the paint can instructions! Some paints can be accept a new coat after just an hour … some require several hours. Me? I always played it safe and waited a full 24 hours between coats.
FINAL FINISHING
Well, at this point you could be completely done …. unless you want to add a final protective topcoat. I elected to use a satin polyurethane for the frames, and glossy for the doors and drawers .Brushing on poly is just another opportunity to introduce brush strokes. Duh! So, I used a wipe on product. You can buy a wipe-on stain, but it’s quite expensive. Or, you can make your own. It’s really quite simple; 50% poly mixed with 50% mineral spirits, such as Naphta. You can make about four or five times as much as a single can would cost. Wipe on thinly with a lint free cloth. One or two passes maximum! Let it dry completely, preferably overnight. Do NOT try to “fix” any spots you missed … you will only mess it up. You’ll get it on the next pass, and no one will ever know the difference. Since it’s 50% thinned, and you’re applying thin coats, about three coats is equivalent to one coat at full strength. I stopped at four coats. One word of warning, if you’re using an oil based poly, and if you apply that to white paint, it WILL turn the white a shade darker. (You can see the two shades of white in the very close-up picture above.) I knew that going in, and I liked the white two-tone look. If that’s not your cup of tea, then use a water based poly. It had no visible effect on the gray paint.
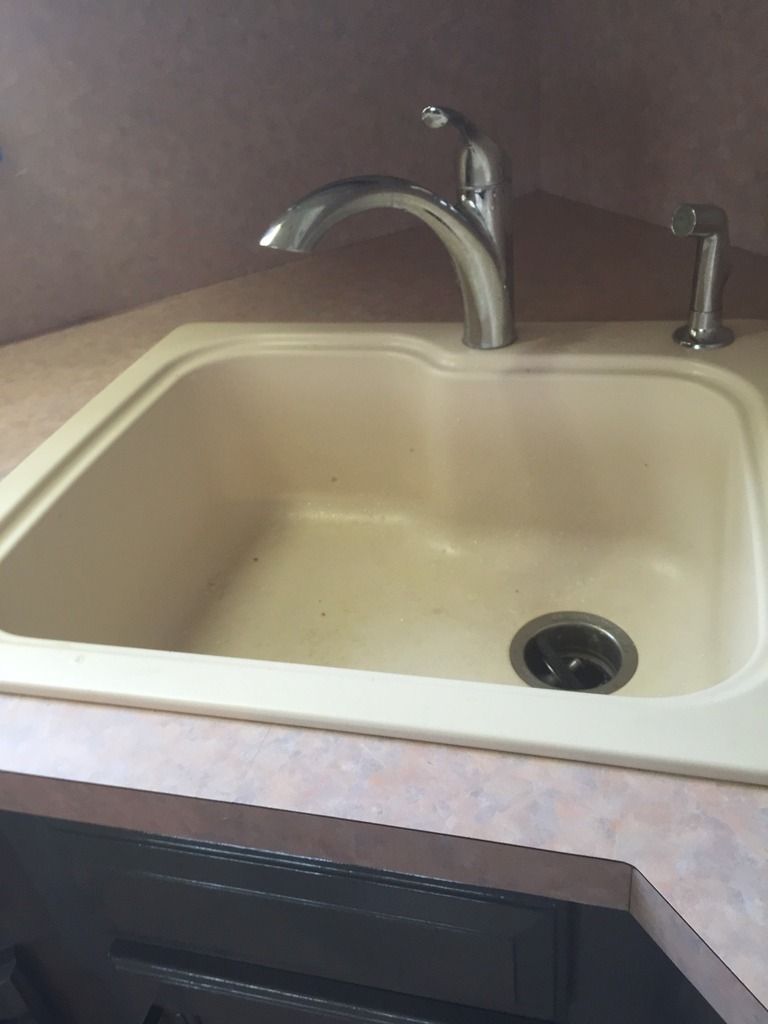
THE COUNTERTOPS and BACKSPLASH
Dull sink / pink countertop and backsplash
Shiney sink / “marble” countertop and white backsplash
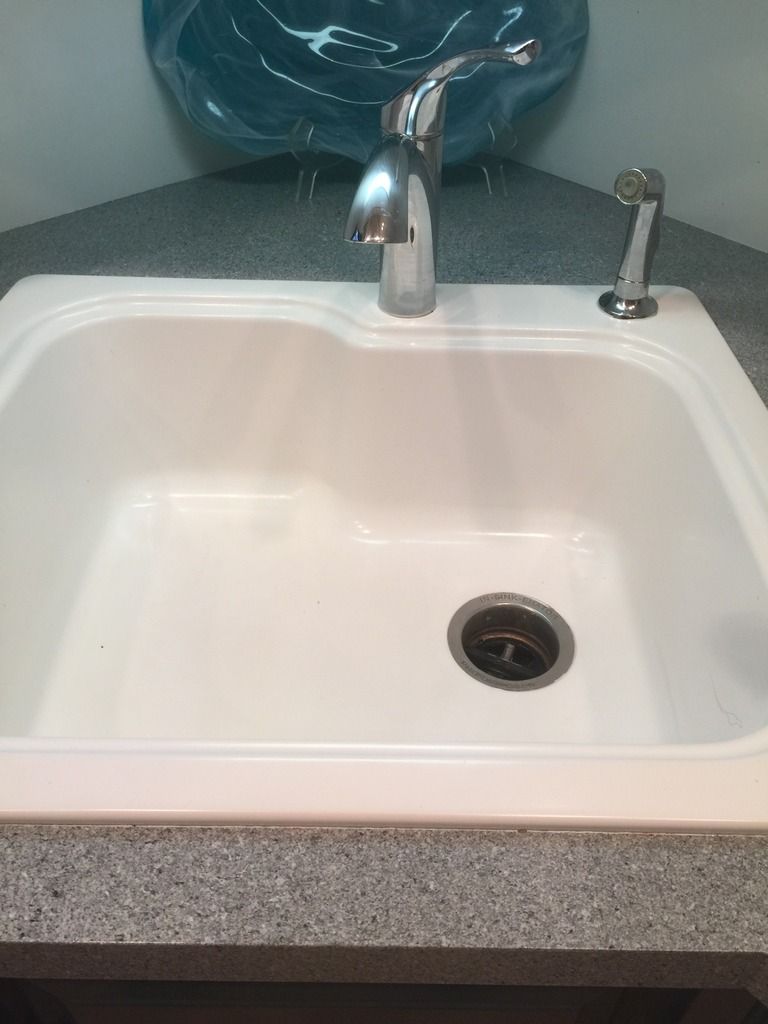
I simply did not want someone to come in and rip up our kitchen. Our countertops were old and ugly, but they were in literally perfect shape … not a single gouge mark or imperfection anywhere. So, we elected to have it refurbished with a crushed stone in acrylic product. A guy from the company below was here for three days … cost us just a bit over a grand … and we are absolutely totally delighted with the results. I’d use these guys again and/or recommend them highly in a heartbeat. There are franchises in just about every state.
In closing, I hope this article was helpful. And if you saved yourself $5,000 by following my advice and doing it yourself, then the least you can do is send me a $25 gift certificate to Barnes&Noble!! Thank yeeew!

Are they suppose to look shiny or is that the lighting/wet paint? Either way it looks like you did a great job.
Stucky wrote,
“Well, at this point you could be completely done …. unless you want to add a final protective topcoat. I elected to use a satin polyurethane for the frames, and glossy for the doors and drawers” .
That’s why they’re shiny Steph.
Touche. But I should’ve made my question clearer. What I was asking is if the paint in the photo is still wet or dry.
Dry. The picture was taken a couple weeks after I was done.
However, it is also the 6 75-watt lights directly above the cabinets, plus the main light, plus the sun-light. It IS gloss poly … but, it’s nowhere near that SHINY!!! (lol) when just the main light is on and the sun isn’t shining directly into the kitchen.
Some people are afraid of gloss and go straight to satin. No need to fear. Gloss can be quite easily removed by very lightly wet-sanding with 1200 grit (or, greater) sandpaper. Just lightly enough to remove the gloss … and that happens quickly. If you see white residue on the sandpaper … stop!! … you already sanded too much. Re-apply with satin, and no one will ever know.
That’s why I was wondering because your picture has a lot of natural sunlight in your kitchen. Makes the shine look exaggerated.
Fantastic job Stucky! I’ve been in the construction business for 32 years and I’m an unrepentant perfectionist. Must be the German blood.
Great write up too.
Nice writeup, Stuck. That Sherwin Williams paint is the exact stuff I use… it’s good sh*t!
Thanks for this, Stucky, a superb tutorial! I will be printing out to my hard files for future reference.
Da P
Stucky, it looks fantastic. The son of a painter learned well and offers numerous good tips to those considering renovating their kitchen. Very nice workmanship, sir. Fashionable clock upgrade looks nice too. Hope you sell it soon. Good luck.
You noticed the clock???? lol Well done, sir!
I noticed the clock also and I also noticed the against ” Fire Code” and ” Common fucking sense code” gas range so close to the wall. 18 inches minimum from wall with a gas range is the ideal setup.
Stucky if you reside in Mexico, don’t worry about the the above mentioned codes or common sense suggestions.
Great job on the painting!!!!!
“— There’s a fine line between applying paint to fast.”
It is -too- mr perfectionist.
Stucky:
speaking as a real estate agent, you did a FANTASTIC job on a budget. I also had a client who did something similar and it turned out great. My one piece of advice is to hire a professional photographer this makes a big difference when you post your pics online.
Shop around, a lot of real estate photographers try upselling all kinds of crap like floor plans and aerial views which do nothing to sell a house. I am always open to offering free advice to anyone on TBP when it comes to selling their house.
Wow!A 10 easy!Good job!
Impressive results, Stucky. I like the bottom cabinets painted a strong contrast color – very trendy.
Now Ms. Freud loves you more than ever.
Yeah, she does.
But … she REALLY loved me more when I surprised her this morning with my homemade kiwi infused cheesecake with a vodka-orange marmalade topping.
Every single year I do something that says Happy 29th. Every year she likes that more and more.
[img [/img]
Oh, and if I’m lyin’ I’m dyin’ ….. it was soooo moist and absolutely delicious.
Stucky: Great job… but you Queers are always good at interior decorating 🙂
Stuckyangelo,
The kitchen looked pretty good at the start…but after closer examination…
it looks really fantastic now. I noticed the sofit area painted marble looking.
That is really a magical touch. The job looks beautiful and professional and
trendy all at once. The clock in the lighter tone is great also.
Thank you for all the instructions and tips. Really, you are as good as any
professional or better.
Suzanna
PS: I have that same angel, but in the house. We love it. Or I do.
Well done Stuckmeister. Very good advice on painting. I will take under advisement but past experience has taught me that I am no painter.
Looks like James Comey applied the Whitewash. Looks good for now but wait a week or two when the pain starts to peel away and the ugly surface beneath shows throw. Best to have cashed the check and be gone when that happens.
Oh, good! Some criticism!!! 🙂
It will NOT peel. Peeling occurs when the surface to be painted is not prepped properly. I prepped quite thoroughly.
A couple years ago I painted shiny dark wood paneling in the basement. Two plus years … not a single teeny tiny peel to be seen. Peeling is for punks.
Thanks everyone for the nice compliments. I was expecting at least some criticism.
Another DIY article coming next week. I got all the prep work done … and tomorrow I actually start staining the front concrete steps. Depending on how it goes, I will be writing one of two articles;
“How I Turned My 50 Year Old Drab Ugly Concrete Into A Thing Of Beauty For Under $100”
or
“How I Royally Fucked Up A Perfectly Good Piece Of Concrete”
“I noticed the sofit area painted marble looking.” —— Suzanna
Yeah …. guess what that strip (sofit) was. Plywood!!! And cheap fucken plywood at that. Even after painting three coats you could see every line of grain. It was god-awful UGLY.
Sooooo, guess what it is now. It’s not paint. It’s Armstrong vinyl floor tile!!! I stood at Home Depot for about an hour matching up the 30-some pieces so that it would look like a continuous piece. Then I glued it. But, the glue didn’t hold to the plywood, even epoxy. The next morning I awoke to 30 some tiles all over the kitchen floor. AAAAARRGGGGHHHH! So, I used teeny tiny brads. And then got some gray paint and added small streak to cover up the nails. Can’t see them even if you look for them. I also used white caulk to cover the crack/space where the tiles meet. The pic is the end result …. where there’s a will, there’s a way.
Late to the party Stucky, but….
The soffit is just plain amazing: B-YOU-TI-FUL.
Added: didn’t notice the clock; after it was mentioned, looked at before and after and the after goes with the tiles (soffit) – nice touch.
Wow. What masterful work. This article is a definite keeper … as was the article on cleaning one’s shingles. I love it when people share their knowledge. I’ve said for years … that knowledge is power. So refreshing when a person shares/gives … allowing others to benefit with no expectation of getting anything back in return. Thanks
Thanks, friend.
However …. actually …. I did ask for a $25 B&N gift certificate! lol
motley…..youtube is a great source of shared info.
Great work, dude.
And great work is its’ own reward – as you already know!
Cheers!
WOW! Very nice!
Since I retired I’ve done major remodels on 6 kitchens and as many bathrooms and I have to say what you’ve done is not an amateur level paint job. You mentioned your father was a professional painter and I have no doubt you picked up a lot more knowledge from him over the years than you realize. Also your write up is excellent, I might have learned a few pointers from it, but I’m not going to admit to that.
A couple of ideas I’d like to throw out, I guess I just like to spend other people’s money.
Two more things I would consider doing:
Crown molding and I would prefer larger rather than small – 5” or 6”.
I might look at doing something with the floor.
This picture will give you an idea of what I’m thinking.
[img [/img]
Stucky- You have really outdone yourself, looks very nice. Everything looks much brighter and up to date.
Yet again, I don’t think a pro could have done a better job.
Excellent job Stucky. Keep it up and you’ll end up with a place so nice you won’t want to move. I agree 100% with the 95% prep and 5% paint.
Painting tries my patience in ways that are best left untried.
Quick question: Could you have used one of those smooth foam “weeny” rollers to apply the primer and initial paint coats? They put paint on pretty uniformly with no brush strokes.
Congrats on your success. I can imagine that it was more difficult and took longer than you anticipated. Thanks for not bullshitting us that it was easy. An admirable job in every way.
Awesome job. I try to be a perfectionist and usually come up short. Better than any brush work I have ever done.
I disagree about the difficulty of spraying. For me it is much easier and faster with an HVLP. Maybe just because I am less talented then you,
I buy nice tools to compensate for lack of talent.
The only thing to add to your brilliant research and explanation is that on a rainy or humid day paint dries even slower which will make you even better.
Like HSF said the other day you would be a success at anything you put your mind to.
For an arrogant bastard you sure do underestimate yourself.!!
Ps. Great article for a newbie!
Really nice work, Stucky. Looks like a million. Love the pic of the homeless guy hosing off the dishes.
Wow, what a great job. I wish you lived near me. Keep these articles coming. I’m learning so much.
The world is racing towards Armageddon and I’m reading an article on painting kitchen cabinets.
Thanks for the distraction.
“Could you have used one of those smooth foam “weeny” rollers to apply the primer and initial paint coats?” ———– IndenturedServant
I don’t see why not.
HOWEVER …. personally I am not comfortable with rollers … although I did use rollers to paint the kitchen walls. But, the kitchen wall is rougher compared to the wood cabinets, which are perfectly smooth. I had this fear that the rollers would just smear the paint on. I felt I had more control with a brush. Also, I was concerned about the “orange peel” effect you can sometimes get with rollers. Lastly, the doors have grooves and valleys inaccessible to rollers, and I didn’t want to mix paint brush and rollers on the same piece.
All that to say, IS, is that I just didn’t feel comfortable (skill wise) using a roller …. even though it might (probably) have worked just fine.
——–
BTW, I like the crown molding idea. Thanks for that.
Really beautiful. The colors you picked are very “of the moment” also, which will doubtless help your sale.
Great write-up, too. You’ve done your German father proud.