

Starting the seeds for you survival garden indoors not only gives you a jump on the growing season, but saves money that can be used for other vital preps, as well.
Relying on a garden center or nursery to provide already started plants for your prepper garden could be a recipe for disaster. If the SHTF in March, and you have not started your own seeds indoors, buying them from a greenhouse business will no longer be an option.

Seed starting should be highlighted as one of the top priorities on your survival plan. Growing your own groceries to prevent the family from starving during a doomsday disaster will only be a sustainable effort if you grow your own veggies from seeds, and keep a hefty stockpile of seeds always on hand to get you to the next growing season
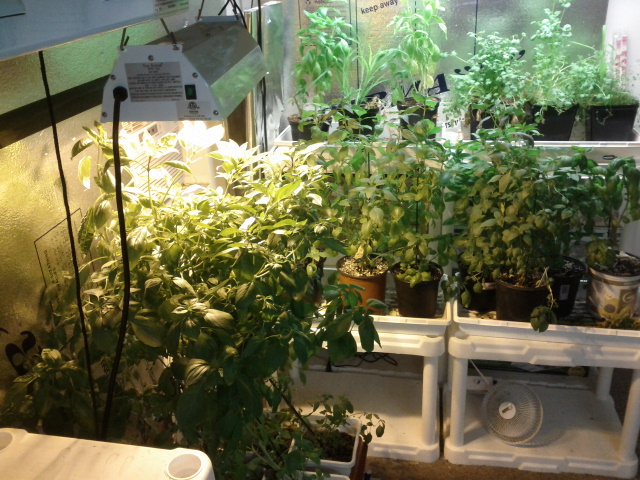
Preppers with a greenhouse can grow copious amounts of seeds to be ready to garden every spring. But, as long as you have enough space for a pop up folding table and either good natural sunlight through a window or invest $40 in a grow light, you can start dozens of plants indoors.
One of the other major benefits involved with establishing an indoor growing area is the ability to cultivate dwarf versions of non-native trees.
These trees can most often live outdoors during the late spring through early fall, but must be moved into a greenhouse or into a growing space inside the home before the temperature drops too much.
Dwarf fruit trees can also be started indoors during the first few months of the year alongside seeds, and then relocated outdoors after the last threat of frost has passed.
Table of Contents
Top 7 Reasons to Start Seeds Indoors
- Starting seeds indoors will ensure you have vegetables, herbs, medicinal, and fruit plants to cultivate if the world goes pear-shaped before you can purchase them from a greenhouse, nursery, or garden center.
- Starting seeds in your greenhouse or inside your home also gives you jump on the growing season. Those extra few weeks could mean the difference between having the time to cultivate crops with a longer growing season in case a cold snap occurs that hampers your gardening plan or allow you to try to grow crops that aren’t necessarily recommended for your regional agricultural growing zone.
- Depending upon your growing season, you could plant cold hardy crops in an “early spring” garden to garner greater overall yields for the year. Common early spring crops include: kale, snow peas, lettuce, broccoli, radishes, Jerusalem artichokes, and carrots.
- Being able to take started plants with you on a bugout can help keep a survival food security plan on track. Possessing the ability to have a portable, growing, and viable food source could mean the difference between keeping the family fed and starving.
- Starting your own plants from seeds is a whole lot cheaper than purchasing plants from a garden center – saving money that can then be applied to other vital preps.
- If you grow your own plants from seeds you know exactly the type of seed (GMO or non-GMO), and what types of fertilizer, pesticides, or herbicides were used in the cultivation of the plants.
- Unless you live in an urban or suburban area (which I would always strongly discourage any prepper from doing) the plants available for purchase at local greenhouses will rarely stray from traditional garden crops. Purchasing seeds online can open up a vast list of non-traditional and dwarf plants that you can grow to help fulfill the nutritional and yield needs of your family.

When to Start Seeds Indoors
Each type of vegetable, fruit, or herb seed you plant will offer specific cultivation instructions on the back of the packet – the same can be said for onion and potato sets and root crops.
But, the general rule of thumb recommends not sewing annual varieties indoors until roughly six weeks before the threat of a final hard frost has passed.
You do not want your plants to become too tall and spindly, or root bound while growing indoors.
A spindly plant will most often experience a reduced yield. A root bound plant can be extremely difficult to transplant when the time comes to harden it off and move outdoors.
Vegetables and Fruit Seed Starting Tips
Most vegetable and fruit seeds should be started inside at the end of January or by the beginning of February.
Starting the seeds at this time will allow them the 6 to 8 weeks they need to get a strong and healthy start, and to reach a height of approximately eight inches by the time they need to be hardened off for outdoor transplanting.
Tomatoes
They need direct sunlight at least 8 hours a day, and a soil temperature that is preferably 80 degrees F (26 C) but no lower than 60 degrees F (15 C).
Peppers
Soak any variety of pepper seeds for 24 to 48 hours to help them germinate before planting in soil. The water helps break through the hard shell of the pepper seeds.
Simply dampen a paper towel or coffee filet, and place the seeds inside and then enclose them in a plastic Ziploc bag – placing them in direct sunlight.
Once the seeds start to sprout, transplant them into seed trays following the package instructions. Pepper seeds thrive in soil temperatures of 80 to 90 degrees F (20 to 32 C).
Brussels Sprouts
To cultivate a fall crop of Brussels sprouts, start the seeds a total of 16 weeks before the expected first of the season.
To start seeds for a summer garden, start them 4 to 6 weeks before the anticipated last frost. To plant, sink the seeds a full half of an inch down in the seed starting mix or potting soil.
Summer Squash
Start seeds one inch down in the seed starting mix. It takes roughly one week to 10 days for summer squash seeds to germinate. They prefer soil temperatures of 85 degrees F (30 C). Do not transplant outdoors until the temperature is at least 70 degrees F (21 C).
Cauliflower
Plant the seeds at the package directs 10 to 12 weeks before the first anticipated frost will occur if preparing a fall garden. Hardened off cauliflower seeds can typically be planted outdoors 14 to 21 days before the final frost of the spring.
Cabbage
When planting a fall garden, start cauliflower seeds 12 weeks before the expected first frost of the season. It is always best to start each cauliflower seeds into its own individual pot for easier hardening off and transplanting. The soil must not be wet, but kept moist during the sprouting period.
Eggplant
For best result with eggplant, you may want to start them indoors up to 9 weeks before the final frost of spring, depending upon your growing climate. They prefer a fine and loose potting soil; vermiculite is highly recommended.
Broccoli
These vegetable seeds only need to be planted one fourth to one half of an inch deep in the seed starter potting soil. Keep the soil moist at all times, but not wet.
Swiss Chard
Plant these seeds at least one half to one inch deep in the seed starter mix. Each seeds will produce more than one plant, so give them plenty of space to grow, and thin them out before transplanting outdoors.

Cucumber
Cucumber seeds do not need to be started until the end of February. The quickest and simplest way to start cucumber seeds is to wrap them in a dampened paper towel.
Once wrapped, put the cucumber seeds in a fairly shallow bowl, then cover the bowl with clear plastic wrap. Place the bowl in a warm spot that gets full sun, and in roughly 3 to 5 days the seeds will sprout.
Watermelon, Pumpkins, Cantaloup, Honeydew, and Gourds
These crops also require a fairly long growing season and should be started by the middle of February.
Melon seeds will not germinate in dirt that has a 65 degree F (18 C) or below temperature. In most growing zones, this type of plant will need about 4 weeks of growing indoors before moving them outside and into the garden.
Strawberries
Strawberry seeds need approximately 6 weeks of growing before they are hardy enough to thrive in an outdoor environment in most climates. Start the seed in a full sun area a minimum of 3 weeks before they will be transplanted outdoors, no matter the climate – for best results.
The soil should be warm and moist to facilitate proper germination. I often place my flats of strawberry seeds on top of the refrigerator so the soil is heated slightly the entire time they are starting to sprout.
Do not start the hardening off process to relocate the strawberry plants outdoors until they boast at least three leaves – for best results.
Green Beans
These seeds are a hardy and quick grower and are typically sown right into the garden soil. But, from a prepping perspective, you may want to start some seeds indoors so you have a portable crop and a backup for any plants that do not survive a bad turn of weather once the garden is ready for planting.
Soak green bean seeds in cool water for 12 to 24 hours before planting to enhance germination. Do not soak them too long or they will not produce.
Plant one inch deep in a moist but not wet soil in a sunny location. When planting green bean seeds indoors, it is best to start them only two to three weeks before the last threat of a hard frost.
Onions
Start onion seeds inside 10 weeks before planning on relocating them outdoors after the last hard frost. Onion sets can be planted just two to three weeks before hardening off to transplant.
Both onion seeds and onion sets need full sun with a good draining soil to germinate properly.
Rice
To start rice indoors, soak the seeds for a full 36 hours, and allow them to dry for 24 hours before putting six inches deep in potting soil. Cover the dirt with roughly 5 inches of water. Rice requires a warm spot in full sun to grow.
Coffee Beans
It can take two and a half months for fresh coffee beans to germinate – but can take up to six months for older beans to sprout. Soak the coffee beans in cool water for 24 hours, and allow to dry completely before planting.
The beans should be sown into either wet vermiculite or a damp sandy mixture. For best results, water twice a day, and make sure the soil is draining well to prevent waterlog or rot from occurring. Planting the seeds inside of a burlap bag may garner the best results.

Beets
If planting in the fall, sow beet seeds that have been soaked in warm cool to warm water for 24 hours, 6 to 8 weeks before the expected first hard frost.
In the spring, sow soaked beet seeds 2 to 3 weeks before the last frost of the season. The soil must be at least 40 degrees for the beet seeds to germinate – which should occur in one week to 21 days after planting.
Carrots
This is another vegetable crop that is traditionally started directly in the garden soil. If you want to ensure that your family (and livestock) will continue to have carrots even if the SHTF before it is time to plant outdoors, start carrots inside using a biodegradable container(s) that can be placed into the ground when the weather warms enough to relocate outdoors.
Scatter the seeds, and cover them with only a light layer of dirt. It takes 2 to 3 weeks for carrot seeds to germinate.
Zucchini
Although zucchini seeds can also be planted directly in the soil, you can start them indoors four to six weeks before the anticipated last hard frost of spring.
Plant just one seed in each tiny pot or seed cell one eight of an inch thick in moist but well draining soil. For best results, soak the seeds in cool water for 24 hours before planting.

Peas
Plant pea seeds two to three weeks before the expected last hard frost of spring. They should be planted one half to one inch thick in moist well draining soil.

Soaking the seeds in cool water for 24 hours can greatly help enhance the germination process. Depending upon the variety of pea, it usually takes 21 to 30 days for the seeds to sprout.
Herb Seed Starting Tips
Vegetable and fruit seeds are not the only plants that can be started indoors during the final weeks of winter. Most common and medicinal herbs can be started in February and hardened off for outdoor transplanting as the last threat of a hard frost begins to pass.
Preppers sometimes don’t see the value of cultivating herbs, and that is a shame. Not only will herbs bolster the flavor of a survival meal – especially if resources run low and a thin soup is all you can muster, but may also possess immune system boosting and other medicinal properties.
When the SHTF, you will not only need to raise and grow your own groceries, but could enhance your family’s chances of survival by cultivating a backyard apothecary patch, as well.
Basil
Start basil seeds roughly six to eight weeks before the final spring frost. The seeds should be sown approximately one fourth of an inch deep in the potting soil mix.
The soil should be about 70 degrees F (21 C) and kept moist during the sprouting process. Basil sprouts should appear between one to two weeks after planting.
Parsley
Soak parsley seeds in water for 24 hours prior to planting, for best results. They should be planted roughly 6 to 8 weeks before being hardened off to relocate outdoors after the last threat of a hard frost has passed. It takes approximately 10 to 25 days for parsley seeds to germinate.
Oregano
It will take about 10 days for oregano seeds to sprout. The seeds should be planted on the surface of the seed starting mix and merely squirted with water, and then covered with clear plastic wrap of a clear seed tray lid.
Oregano seeds need full sun to germinate, and should be planted 4 to 6 weeks before the anticipated last hard frost of the spring.
Chamomile
Start chamomile seeds 3 to 4 weeks before the threat of a hard frost. They require a well draining soil. To plant, lightly broadcast chamomile seeds on the loose top of the soil and then only mist slightly with water.
Marshmallow
Marshmallow seeds should be mixed with peat moss and kept in a cold environment or the refrigerator for 4 to 6 weeks before planting. Each seed should be planted in its own small pot roughly six weeks before the expected last frost of spring.
Stevia
This natural sugar substitute is fairly easy to germinate and grow. Start seeds eight to 10 weeks before the danger of a final hard frost has passed. Stevia seeds germinate best in 75 degree F (23 C) temperatures. It will take roughly one to three weeks for sprouts to emerge.
Garlic
Garlic can be planted during the early spring or late fall. Cloves should be planted in a fine soil root side down. For a spring harvest, garlic will need to be planted in the fall. Plant cloves one to two inches deep in the soil.
Thyme
Scatter seeds over loose soil, then lightly scatter seed starting mix on top of them. Cover the seeds with clear plastic wrap, and place in a warm and sunny spot. Thyme seeds begin to sprout in approximately 1 to 12 weeks.
Rosemary
This herb is notoriously difficult to cultivate from seed. Starting rosemary from cuttings usually brings greater success. For best results (meaning more than a 30% seed growth rate use bottom heat to keep the soil at a steady 80 to 90 degrees F (26 to 32 C).
Plant rosemary seeds on loose soil and barely cover them over with dirt. It takes approximately 15 to 30 days for rosemary seeds to germinate.
Cilantro
Plant these seeds one fourth of an inch deep in well draining soil. It takes approximately one week to 10 days for cilantro seeds to germinate. Plant approximately four weeks before the final hard frost of the spring.
Borage
Start this edible and medicinal herb three to four weeks before the threat of the last hard frost has passed. Plant the seeds just below the surface of a seed cell with moist and well draining soil.
Mint and Spearmint
Start the seeds 8 to 10 weeks prior to the final hard frost of the spring. Mint and spearmint seeds should be planted one fourth of an inch deep in soil that is moist, well draining, and holds a temperature of 70 degrees F (21 C). It takes roughly one to two weeks for mint and spearmint seeds to sprout.
Valerian
Plant this herb four to eight weeks before the last hard frost in the spring. Mist the dirt with warm water before planting the seeds just below the surface of the soil.
Place them in a warm and sunny spot. For best results, cover the seeds with a clear plastic seed tray lid or plastic wrap. It typically takes valerian seeds one to two weeks to sprout.
Burdock
Plant these seeds four to six weeks before the danger of a hard frost has passed. Burdock should be planted in a loamy soil after being stratified.
Plant these herb seeds one eighth of an inch beneath the surface of the soil, and keep them moist but not overly wet. Burdock typically sprouts in 7 to 14 days.
St. John’s Wort
Start this hard and easy to grow herb six to eight weeks before the threat of a hard frost is over. Press the seeds gently into the soil, but do not cover to expose them as fully as possible to light.
St. John’s Wort prefers full sun and moist soil, but can tolerate both dry soil and partial shade. The seeds should germinate in approximately 10 to 20 days.

General Seed Starting Hints and Tips
The Dirt Matters
Each packet of seeds you purchase will provide at least basic instructions to cultivate the vegetable, fruit, or herb – including the type of soil that is recommended to garner the best chance at a hefty yield.
You can purchase seed starting soil from a garden center, but if you cultivate your own compost, using that instead can be quite a money saver. To give the compost mixture extra seed sprouting prowess, consider buying some peat moss, and either vermiculite or perlite to add to the mix.
Standard potting soil is not generally recommended for seed starting because it is often not fine enough for tiny seeds to penetrate properly and establish solid roots.
Follow The Sowing Instructions COMPLETELY
If the seed packet recommends soaking the seeds or stratifying them, take the extra time to not only do so, but to follow the exact directions for doing it.
You may still germinate the seeds by merely tossing them into some dirt, but the end result will likely be a far less substantial yield, and possibly weaker plants.
You do not need to get out a rule to gauge the depth of the seed planting, but do eyeball it to ensure as much as possible the seeds are placed at the recommended depth – for best germination and yield results.
Keep Them Warm
Nearly any vegetable, fruit, herb, or medicinal flower seeds that you attempt to cultivate will need protection. Covering the seeds with clear plastic wrap is always a sound idea.
I know this can be a pain when it comes time to water, but the little bit of extra effort can really pay off in the long run.
The seed starter trays with clear plastic lids are far easier and quicker to use to start seeds than clear plastic wrap, but those seed starting tray kits are also many times more costly than purchasing a generic brand plastic wrap from a local dollar store.
Make sure to use a toothpick to poke a few ventilation holes in the plastic wrap to avoid the humidity level from increasing so much that mold forms on the soil, or on the germinating seeds.
Placing the pot or tray the seeds are in on top of the refrigerator, on heating pads, or a gardening – livestock heat mat, when attempting to hit high soil temperatures can also pay off.
Once most of the seeds have sprouted, you can remove the plastic wrap or clear plastic topper as long as your home or greenhouse is not too cold or wet. If it is, a drastic change such as this one could kill the forming plants overnight.
Watering Success and Failure
It is always best to use a squirt bottle to provide moisture to seeds. A watering can may dislodge fragile and still forming roots or break a seedling entirely.
If the planting instructions recommend “misting” which is common for incredibly small seeds or ones sown directly onto the soil, use a squirt bottle but do not direct the spray downward onto the seed or the soil where it is growing but not yet emerged.
If you do not have a squirt bottle or if it breaks, try using a turkey baster to gently water the seeds and young plants. Seedlings are typically more susceptible to drying out that young to mature plants, so keep an eye on the moisture levels in the dirt on a daily basis.
Thinning Plants
If the seed packet recommends thinning the seeds as they grow into plants, do so once they get their second set of leaves (unless otherwise stated). Some plants need three leaves before thinning out and separating.
When you move the seedlings to their own individual pots or to a large group container, use the best soil you can get your hands on to make the transition as easy as possible for them.
Water the transplants well, and move them slightly out of direct sunlight to give the seedlings time to acclimate to their new environment before resuming a regular growing schedule.
Room Temperature
Most seeds have a greater sprouting success rate when exposed to consistent temperatures. Unless the directions on a seed packet say otherwise, it is best to keep the area where the seeds are being grown in at 70 to 85 degrees F (21 to 30 C).
Placing seeds in a windowsill to grow to maximize their exposure to direct sunlight is fine in most cases, but remember to place you hand on the window to check how the immediate environment feels around the seeds during the winter time, or in especially cold climates.
Sunlight
Grow lights used above the seeds increase both light and temperature. Make sure the seeds are not being exposed to too hot of a temperature, and rotate them once of twice a week to ensure they all get a chance at garnering the top light position.
If the seeds are being exposed to either too much light or heat, raise the heat lamp or turn it off for several hours during the prime natural light part of the day.
Keep a keen eye on the direction the sprouting seeds are growing. If they are titling one way or another they are likely striving to get closer to either natural or artificial sunlight.
This is a common occurrence when growing indoors, and the trays or pots simply need rotated regularly, as noted above.
If sprouted seeds appear to be looking spindly, they are growing too quickly and perhaps getting too much sun or heat. A sprindly little plant does not usually thrive once transplanted outdoors, and either dies or produces a lackluster yield.
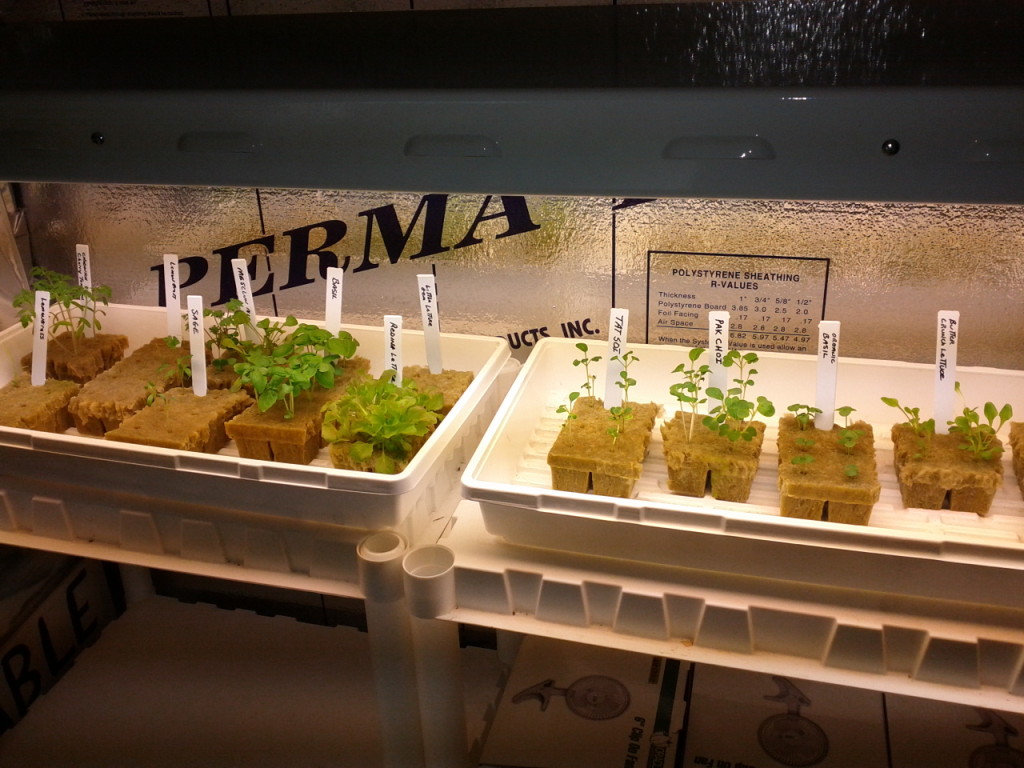
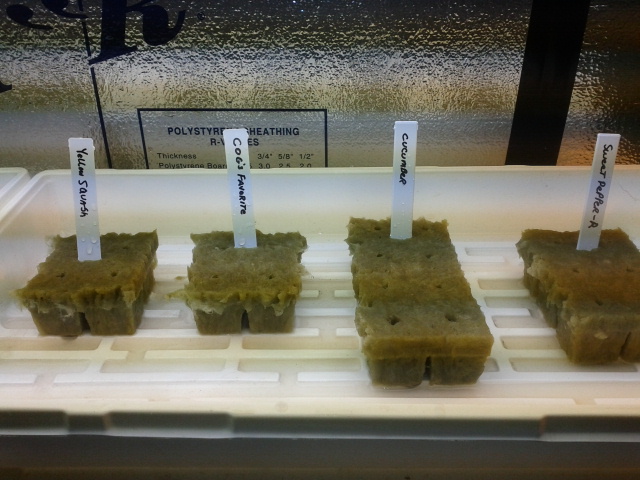
Know What You Grow
You may think that you will not forget what seeds you have planted in which container or can tell one sprout from another – but this is often not the case.
Use a permanent market, clothespin, popsicle stick, or something similar to label each tray or pot. It will be impossible to properly cultivate what is growing in a seed tray or pot if you are unsure of what is sprouting in the dirt.
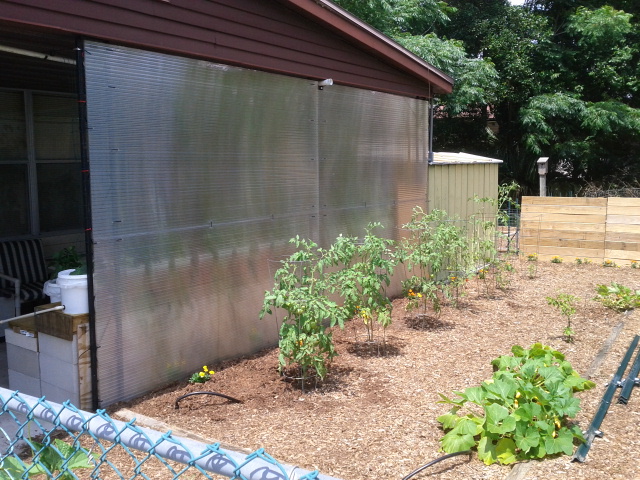
Hardening Off Is Always Required
All plants, regardless of how young or mature they are, must be hardened off before relocating them from inside growing to outdoor cultivation. Keep a checklist of the growing times and recommendations, as well as when the seeds were started to make sure you are hardening the sprouted plants off at the right time.
While there are some general hardening off processes that are used for nearly all vegetable, herb, and fruit plants, refer to the directions for each variety you are growing to ensure you are following the specific timing of each step.
When hardening off a plant to relocate it outdoors (or bring it inside in a pot as the seasons change for perennials) the watering and fertilizing routine either changes or stops for a specified amount of time.
Typically, the plants are moved outside in 1 hour increments to acclimate, or to harden them to the new environment.
Any unseasonably cold or warm temperatures, as well as excess precipitation may alter the hardening off routine, and should be noted in plant variety specific hardening off directions.
Final Words
Before purchasing seeds, make sure to review their intended growing zone. It is possible to grow non-native plants or those recommended for areas with a cooler or hotter growing zone.
Doing so, however, successfully will require planning including adjustments to when seeds are started or planting them in pots so they can be brought indoors during when your season becomes either too cold or too hot.
It can be very exciting to start growing your own plants indoors, so much so that you can cultivate more than you have space to grow to maturity.
You must keep your garden space in mind or prepare more areas for grocery growing when the seeds are planted, and not wait until they are hardened off for outdoor cultivation and there is no where to put them.
It is my sincere desire to provide readers of this site with the best unbiased information available, and a forum where it can be discussed openly, as our Founders intended. But it is not easy nor inexpensive to do so, especially when those who wish to prevent us from making the truth known, attack us without mercy on all fronts on a daily basis. So each time you visit the site, I would ask that you consider the value that you receive and have received from The Burning Platform and the community of which you are a vital part. I can't do it all alone, and I need your help and support to keep it alive. Please consider contributing an amount commensurate to the value that you receive from this site and community, or even by becoming a sustaining supporter through periodic contributions. [Burning Platform LLC - PO Box 1520 Kulpsville, PA 19443] or Paypal
-----------------------------------------------------
To donate via Stripe, click here.
-----------------------------------------------------
Use promo code ILMF2, and save up to 66% on all MyPillow purchases. (The Burning Platform benefits when you use this promo code.)


MiracleGrow’s aerogarden is a great toy to play with. Tabletop hydroponics with a seed starting tray. It’s a handy tool and young one likes to watch the plants grow.
Holy crap! More than enough detail to gag a horse. If that level of detail is needed, most of us can’t grow our own food. I think there’s another way to survive: be the best warrior around and live off the land. There will be plenty of protein one way or the other. Pretending that option dies not exist because it’s scary being protein does not change what the winning strategy will be. The Lord shall provide.
So you are long pig.
Why plan to survive at all? Just wing it. That’s always been a winning strategy.
You shouldn’t show up for life unprepared; the final exam is a motherfucker.
Growing food is not that easy. That’s why farming is a professional skill. Gardening requires learning and effort. If everyone had your attitude, there would be no food.
If you can’t be bothered to learn how to take care of yourself, don’t come begging or looting around those of us who did.
I agree with Doug. I will always have a small garden but if you want meat to go with all yer veggies, then let’s barter.
I start all my plants from seed with one 4 foot long 4 bulb light you can start a hundred plants. I grow stuff inside during the colder months also. I also have a homemade hydroponics set up out side and grow in the ground also.
Great set-up. I snagged 2 old laundry carts ( the 3 plastic shelf types with the sanitary, vinyl cover) that were being trashed at my hospital. Made of PVC piping and 3 shelves, I then purchased hanging grow lights which I hung with wire at each level. $150 bucks and I’ve been starting my own seeds for 10 years ( plus I have fresh lettuce/kale/broccoli florets all winter)
the cover keeps in the heat from the lights– remember to transplant to larger pots as the things grow ( from little 6 pack trays to individual 4 inch pots).
When I was a newbie I got those spindly pepper, tomato, broccoli plants etc– I learned that putting a fan on for a half hour here and there and also just brushing the plants with your hands triggers more plant energy to the stalk during the earlier growth stages– this makes hardening when transplanting outdoors more successful.
Sounds like you have a nice setup. I ‘m in my 8th year now, I started with a very cheap prototype so I could understand the mechanics of the system, after that first year I built the dutch bucket and added buckets to it in the following years.
I like the auto aspect of it like you have with the fans, I have them also and every thing is on timers. Running the lights during the cold months helps with heating the house. I love growing lettuce inside also.
I grow tea also, I did this right in the front of the house, I got a lot of compliments from the neighbors on this one, I shared with them.
Drying lemon balm tea inside.
Cucumbers on the fence, sexy as fuck.
Gorgeous… we are having an extension put onto the western side of our barn and I plan to make a greenhouse area look as awesome as yours!
Beautiful layout…
Thanks Javelin.
Awesome set up! Don’t have the pics on my computer right now but I have a greenhouse and outdoor gardens. Lot’s of seedlings sprouting now and first group of tomatoes planted in the ground inside the greenhouse. Love your hydro set up. That’s something I definitely want to look into… Chip
You should look into, this is the first video I saw on it, after watching this I said to myself I can build that and I’m sure you can also.
Quick short video on the system
Thanks for the videos. I will definitely watch them here shortly. Here are some pics of my greenhouse. It’s 10′ x 24′. The south side is for in ground planting while the north side has a bench and shelves. I have two temperature controlled louvered fans on the north as well. Just starting so not much to see in the way of plants. I’ll post updates tho… Chip
Chip the 10 by 24 is a perfect size, you can grow a lot of stuff in there. I can vision a hydro system on the north side on those shelves.
You should look into a system called an Emily garden , they’re self contained systems, six plants per unit. I’ve grown everything in them. I had an extra one new in a box and set it up at my brothers house this past Christmas, his wife has a small garden on the backside of house.
You have a nice space to work in, I love it.
Here are some pictures of a garden strip that we did based on a video that HSF posted awhile back. You dig down about 24″ and throw all kinds of leaves, sticks, and decomposed compost type materials. Put the soil back on top of it mixed with peat, sand, and composted manure. We have high winds here in South Texas so I also put clear polycarbonate panels on the side. It works great and anything I plant here grows like crazy. These pictures are current day and we’re in the middle of winter… Chip
Those clear polycarbonate panels are nice to work with. I like the idea of earth materials as it makes excellent compost, you should add to it every year.
Looks great thanks for sharing the pics, this is how we get ideas.
I start all my plants from seeds in a indoor grow room, you can start a 100 plants with one 4 bulb 4 foot fixture.

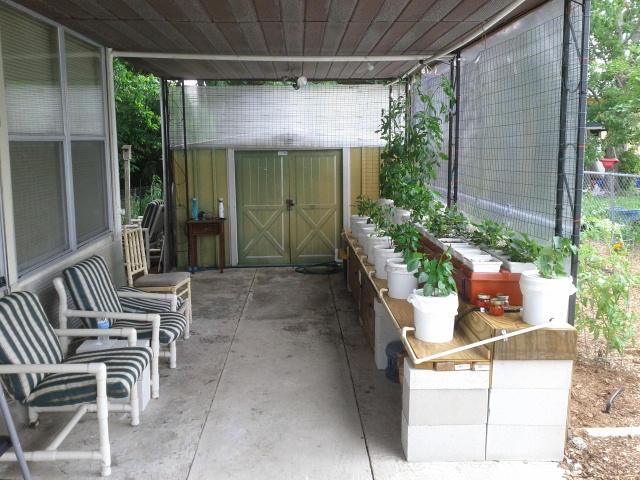
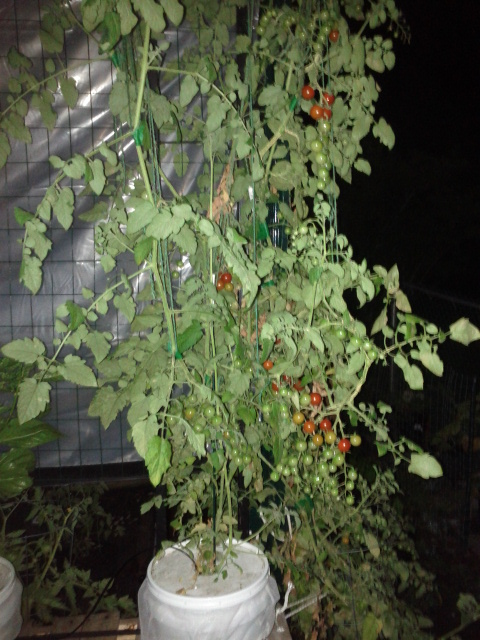
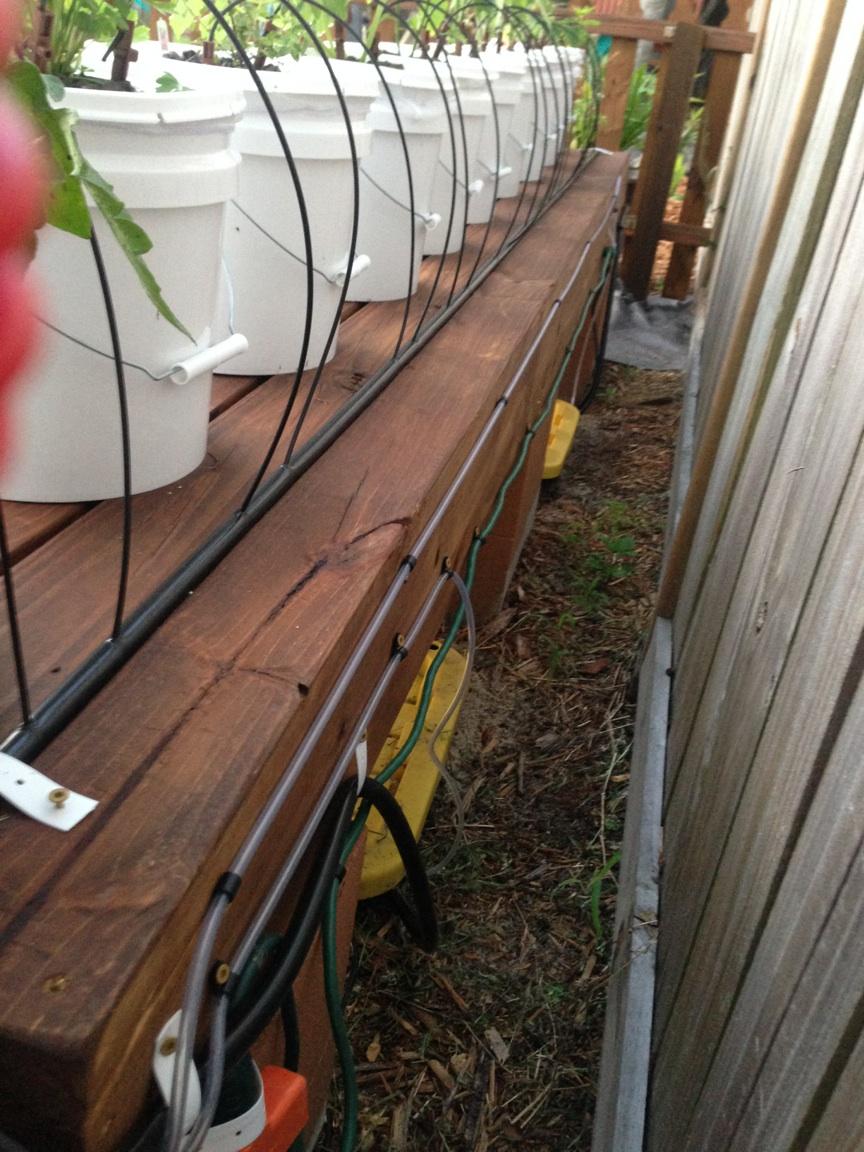
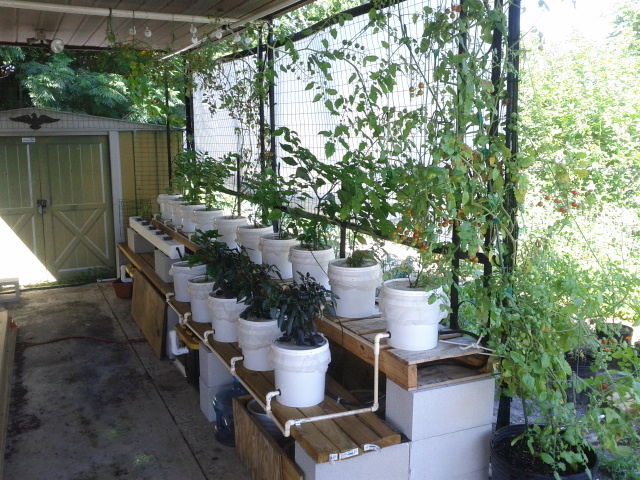
Homemade Dutch bucket system pretty cheap to build. This cherry tomatoe plant produced over 500 tomatoes.
I built this one a few years ago for a friend for a fraction of the cost on those stand alone towers.

Big Respect! That is an epic hydro system! Hat off.
Thanks, appreciate that:)
Great job indeed!
Thanks GCP, I had to build this one because wifey wanted it to look nice, so I built it nice and wifey loved it. Mine wasn’t as nice, but that’s okay with me, I just love growing things and doing it as healthy as possible.
I am planning on putting in a hoop house this Spring. USDA has a program that will cover 2/3 of the cost if you qualify. It’s maybe the only good thing Big Mike Obama ever did.
So my plan is to do about a 24×60′ hoop house. I’m interested in collecting runoff via gutters and cistern, geothermal cooling, and solar fans to keep air flowing. Any clever ideas or suggestions?
Ya buddy….that is outstanding SS!
Hi stacking stock,
I have been growing vegetables since I was a wee lad and was born with a green thumb. Your set up is impressive and I have respect for that, problem is it’s very hard to pull off organically which is the only way I roll. If you use chemicals make sure to quit a month before harvest and flush with tons of water , cheers.
Here’s the stuff I use and I never use pesticides.
Seriously impressed…
Thanks, It’s looks like it’s hard work but it’s not at all. I spend maybe 10 hours a week and a lot of that is just taking in the marvels of what one can do.
This was my first set up
The first Habanero pepper in the Dutch bucket hydroponic system. I grew 1000’s of them.
http://twoicefloes.com/wp-content/uploads/2014/05/Picture-131.jp
Pulley system to support the plants.
Root system of plant.
This is a Peruvian Purple pepper plant. It goes through so many stages of growth., from black leaves and stem to beautiful purple flowers with black peppers that turn red when ripe. The peppers are very small and packed with seeds and it’s a little on the hot side.
Thanks again for your kind words.
This is seriously awesome, man. Great work.
TC, thank you:)
Very much appreciated! Great ideas.
Thanks MG:)
I like seeing people who promote life.
I want to do more of this.
And I like the idea of being your own source of food.
I think more of us will be embracing gardening and farming for ourselves in the future.
G you can can start small and go from there. It feels so good producing food that you grew yourself and knowing what was used while growing it.
I hope you start one soon.